
Peanut Butter Spider Cookies are a fun Halloween treat that combines soft, chewy peanut butter cookies with miniature peanut butter cups, melted chocolate, and candy eyes. Each cookie becomes a little chocolate spider, making these treats a playful addition to Halloween parties, school celebrations, dessert tables, or a cozy baking afternoon at home.
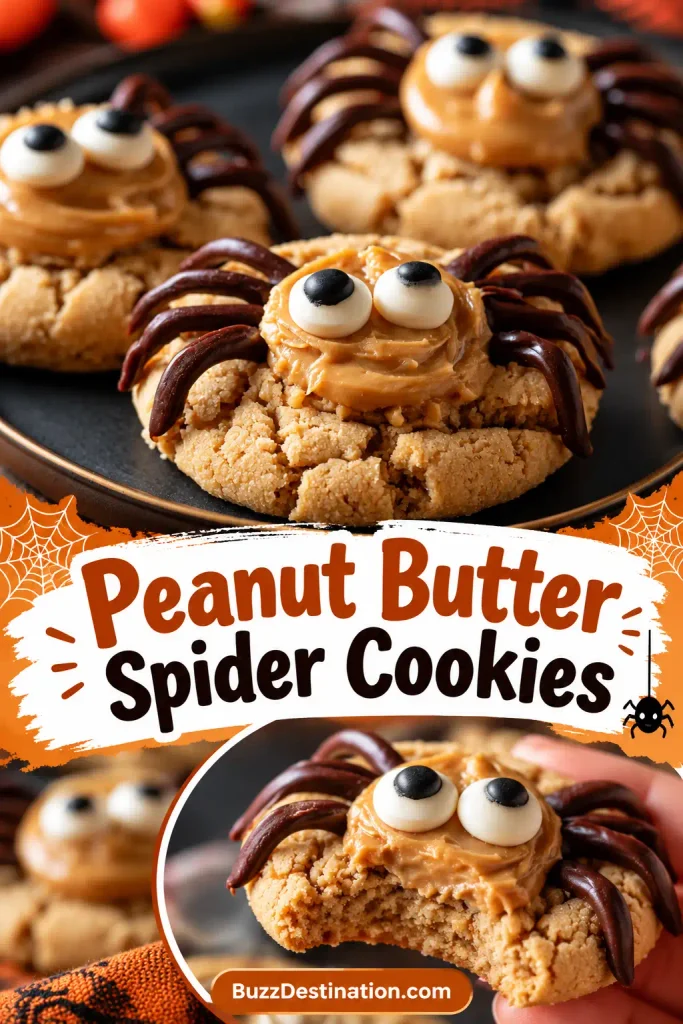
The best part is that these cookies start with a familiar peanut butter cookie dough. Brown sugar adds a rich, caramel-like sweetness, creamy peanut butter gives the cookies their signature flavor, and a combination of baking soda and baking powder helps create a tender texture. Once the cookies are baked, mini Reese’s Peanut Butter Cups, chocolate drizzle, and candy eyes transform them into adorable spiders that are almost too cute to eat.
Why You’ll Love This Recipe
- Perfect for Halloween: The spider decorations make these cookies festive without requiring complicated decorating skills.
- Rich peanut butter flavor: Peanut butter in the dough pairs naturally with the miniature peanut butter cups on top.
- Soft and chewy texture: Brown sugar and creamy peanut butter give the cookies a satisfying bite.
- Fun to decorate: Melted chocolate creates the spider legs, while candy eyes bring each little spider to life.
- Easy-to-find ingredients: The recipe uses familiar baking staples and popular peanut butter candies.
- Great for sharing: Arrange the finished cookies on a platter for Halloween parties, bake sales, or seasonal gatherings.
Preparation and Tools
Before you begin, measure your ingredients and prepare the decorations. The cookies are easiest to assemble when the peanut butter cups, melted chocolate, and candy eyes are ready to use.
You will need a large mixing bowl, an electric mixer or sturdy hand mixer, measuring cups and spoons, a kitchen scale if you prefer weighing ingredients, a spatula, and a baking sheet. Parchment paper is helpful for lining the baking sheet and making cleanup easier.
You will also need a small microwave-safe bowl for melting the chocolate chips with the neutral oil. A piping bag or a small zip-top bag with a tiny corner snipped off makes it easier to draw thin spider legs. A small spoon can work too, although the lines may be less precise.
Set the butter out ahead of time so it reaches room temperature. It should feel soft enough to press with a finger but should not be melted or greasy. Unwrap the mini Reese’s Peanut Butter Cups before baking so they are ready when the cookies come out of the oven.
Preparation Tips for the Best Peanut Butter Spider Cookies
Use creamy, conventional peanut butter. The recipe specifically calls for creamy peanut butter that is not natural. Conventional peanut butter generally has a more consistent texture, helping the dough hold together and bake evenly. Natural peanut butter can separate and vary in consistency, which may affect the cookies.
Bring the butter and egg to the right temperature. Room-temperature butter creams more easily with the sugars, while a room-temperature egg incorporates more smoothly into the mixture. This helps create a cohesive cookie dough.
Measure the flour carefully. Too much flour can make the cookies dry or crumbly. For the most consistent results, weigh the flour to the specified 180 grams. If using measuring cups, spoon the flour into the cup and level the top instead of packing it down.
Prepare the toppings in advance. Peanut butter cups and candy eyes should be ready before the cookies finish baking. Adding the candies while the cookies are still warm helps the peanut butter cups settle into the tops without requiring excessive pressure.
Let the chocolate cool slightly before decorating. The melted chocolate should be fluid enough to pipe but not so hot that it melts the peanut butter cups or causes the candy eyes to slide. If the chocolate becomes too thick, warm it gently until it reaches a workable consistency.
Ingredients for Peanut Butter Spider Cookies
Each ingredient contributes to the flavor, structure, or Halloween decoration of these cookies.
- Unsalted butter: One-half cup, or 113 grams, provides richness and helps create a tender cookie. Using unsalted butter also gives you better control over the salt in the dough.
- Brown sugar: The 107 grams of brown sugar add moisture and a deeper, caramel-like flavor that complements peanut butter.
- Granulated sugar: The additional 66 grams of granulated sugar balance the brown sugar and contribute to the cookie’s sweetness.
- Creamy peanut butter: Three-quarters cup, or 201 grams, delivers the main flavor and helps create the characteristic soft, slightly dense texture.
- Large egg: The egg binds the ingredients together and contributes moisture and structure.
- Vanilla extract: One teaspoon rounds out the peanut butter flavor and adds warmth.
- All-purpose flour: The 180 grams of flour provide the structure needed to hold the cookies together and support the decorations.
- Baking soda: One teaspoon helps the cookies spread and develop their characteristic baked texture.
- Baking powder: One-half teaspoon works alongside the baking soda to provide additional lift.
- Salt: One-half teaspoon balances the sweetness and brings out the peanut butter flavor.
- Granulated sugar for rolling: This creates a light sugar coating on the outside of each dough ball.
- Mini Reese’s Peanut Butter Cups: These form the bodies of the spiders and add a second layer of peanut butter and chocolate flavor.
- Semi-sweet chocolate chips: One-half cup, or 85 grams, is melted to make the spider legs.
- Neutral oil: One-half teaspoon helps the melted chocolate become smoother and easier to pipe.
- Candy eyeballs: These provide the finishing detail that makes the cookies look like little spiders.
How to Make Peanut Butter Spider Cookies
Step 1: Prepare the Cookie Dough
Begin by creaming the room-temperature butter with the brown sugar and granulated sugar in a large mixing bowl. Beat until the mixture looks lighter in texture and becomes smooth and fluffy.
Add the creamy peanut butter and continue mixing until it is evenly incorporated. Scrape down the sides of the bowl as needed so that the mixture combines evenly.
Add the egg and vanilla extract, then mix until the wet ingredients are well combined. Avoid leaving streaks of butter or peanut butter around the bottom of the bowl.
In a separate bowl, combine the all-purpose flour, baking soda, baking powder, and salt. Mixing the dry ingredients separately helps distribute the leavening agents and salt throughout the flour.
Add the dry ingredients to the peanut butter mixture and mix just until a cohesive dough forms. Stop when no obvious dry flour remains. Overmixing at this stage can make the cookies firmer than desired.
Step 2: Shape and Coat the Cookies
Pour some additional granulated sugar into a small bowl for rolling.
Shape the dough into individual portions, then roll each portion in the sugar until lightly coated on the outside. The sugar adds a subtle crunch and gives the cookies a slightly sparkling finish.
Arrange the dough portions on a prepared baking sheet, leaving enough space between them for spreading during baking. Avoid crowding the baking sheet, as cookies placed too close together may spread into one another.
For more even results, try to keep the dough portions similar in size. Consistent sizing helps the cookies bake at approximately the same rate and makes the finished spider decorations look uniform.
Step 3: Bake the Cookies
Bake the prepared cookies according to the recipe’s established baking temperature and timing. The exact temperature and baking duration were not included in the supplied ingredient list, so they should be confirmed from the original method rather than guessed.
Watch for visual signs of doneness. The cookies should look set around the edges while the centers may remain slightly soft. Peanut butter cookies can become dry if baked for too long, so avoid waiting until the entire surface looks deeply browned.
Once baked, remove the baking sheet from the oven and prepare to add the peanut butter cups while the cookies are still warm.
Step 4: Add the Peanut Butter Cup Spider Bodies
Place a mini Reese’s Peanut Butter Cup on top of each warm cookie, positioning it near the center. Press gently enough to help the candy settle into the cookie without crushing it or breaking the cookie’s surface.
The warmth of the freshly baked cookie helps the bottom of the peanut butter cup soften slightly, allowing it to adhere. However, the candy should retain its general shape rather than melting completely into the cookie.
Work carefully and consistently, adding one peanut butter cup to every cookie. If the cookies are extremely hot, allow them to settle briefly before decorating so the candy does not become excessively soft.
Let the cookies cool enough for the peanut butter cups to hold their shape before adding the chocolate legs and candy eyes.
Step 5: Melt the Chocolate for the Spider Legs
Place the semi-sweet chocolate chips and neutral oil in a microwave-safe bowl. Heat gently in short intervals, stirring between each interval until the chocolate is smooth.
The oil helps loosen the chocolate, making it easier to pipe thin lines without breaking or clumping. Avoid overheating the mixture, as chocolate can become thick or grainy when exposed to too much heat.
Transfer the melted chocolate to a piping bag or a small zip-top bag. Snip a very small opening at the corner so you can control the flow.
Before decorating the cookies, test the chocolate on a piece of parchment paper. The lines should flow smoothly and be thin enough to resemble spider legs.
Step 6: Pipe the Spider Legs and Add the Eyes
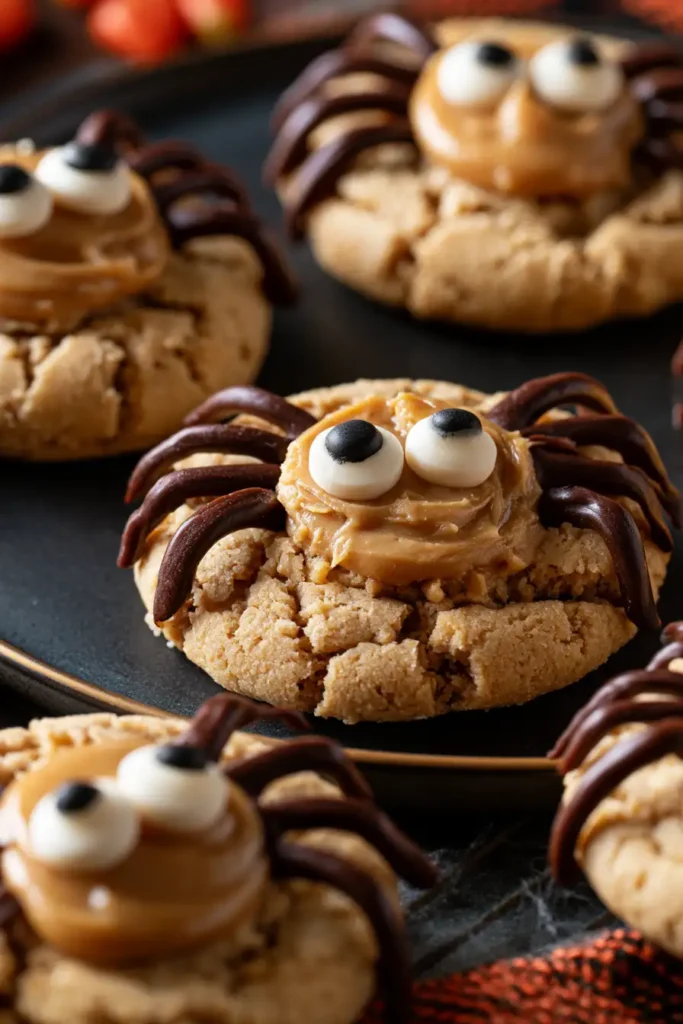
Pipe thin chocolate lines extending from the sides of each peanut butter cup to create the spider legs. You can make several short lines on either side, angling them slightly outward to create a recognizable spider shape.
Keep the lines relatively thin. Thick chocolate legs can overpower the small cookies and may take longer to set.
Add the candy eyeballs to the front-facing part of each peanut butter cup. Use a small amount of melted chocolate as an adhesive if needed, positioning the eyes close together to create a playful expression.
Allow the chocolate decorations to set before transferring the cookies to a serving platter or storage container. Once the chocolate firms up, the spider details will look cleaner and be less likely to smudge.
Notes for Perfect Peanut Butter Spider Cookies
- Choose the right peanut butter cups: Mini Reese’s Peanut Butter Cups are ideal for creating the spider bodies. Keep them unwrapped and ready before the cookies finish baking.
- Adjust the chocolate consistency: If the melted chocolate is too thick to pipe, warm it gently and stir until smooth. The small amount of neutral oil helps make the chocolate easier to handle.
- Let the decorations set: Allow the cookies to cool completely before stacking or storing them. This helps prevent the chocolate legs and candy eyes from smearing.
- Make the spiders your own: Vary the direction of the chocolate legs or the placement of the candy eyes to give each cookie a slightly different expression.
- Use a small piping opening: A narrow opening makes it easier to draw delicate legs and keeps the decorations from looking too heavy.
Common Mistakes to Avoid
Using Melted Butter Instead of Softened Butter
The recipe calls for room-temperature butter, not melted butter. Melted butter changes the consistency of the dough and can cause the cookies to spread more than expected. Allow the butter to soften naturally until it is pliable but still holds its shape.
Adding Too Much Flour
Packing flour into a measuring cup can result in dry, dense cookies. Weighing the specified 180 grams is the most reliable option. If measuring by volume, spoon the flour into the cup and level it gently.
Overbaking the Cookies
Peanut butter cookies can become dry when left in the oven too long. Look for set edges and centers that still appear slightly soft. Follow the original recipe’s baking time and temperature, since these details were not included in the supplied ingredient list.
Pressing the Peanut Butter Cups Too Hard
The cookies should be warm enough to help the peanut butter cups adhere, but pressing too firmly can break the cookies or distort the candies. Gently position each cup on the cookie and allow the residual warmth to do the work.
Decorating While Everything Is Too Warm
Chocolate that is too hot can soften the peanut butter cups, while very warm cookies can make the decorations slide. Let the cookies cool enough to support the toppings, and allow the melted chocolate to become slightly less hot before piping the legs and attaching the candy eyes.
Making the Chocolate Legs Too Thick
Thick chocolate lines can make the spiders look bulky and uneven. Use a small piping opening and apply steady pressure to create thin, defined legs. If a line breaks, simply pipe another short line beside it rather than adding a large amount of chocolate.
What to Serve With Peanut Butter Spider Cookies
Peanut Butter Spider Cookies are rich, sweet, and chocolatey, so they pair especially well with simple drinks and lighter treats.
- Cold milk: A classic pairing that balances the rich peanut butter and chocolate flavors.
- Hot chocolate: A cozy option for Halloween gatherings, especially on cool autumn evenings.
- Coffee or espresso: The roasted flavor of coffee complements the sweetness of the cookies.
- Apple slices: Fresh, crisp apple slices provide a refreshing contrast to the soft cookies.
- Halloween snack boards: Arrange the cookies alongside pretzels, popcorn, grapes, and other seasonal treats for a festive dessert spread.
For a party, arrange the cookies on a flat platter with the spider legs facing outward. Leaving a little space between the cookies helps preserve the decorations and makes each spider easier to see.
Storage Instructions
Storing at Room Temperature
Once the chocolate decorations have completely set, place the cookies in an airtight container. Store them in a cool, dry location away from direct sunlight and heat.
For the best texture and appearance, enjoy them within about 3–4 days. Warm conditions can soften the chocolate and peanut butter cups, so choose a cool storage location.
If you need to layer the cookies, place parchment paper between the layers to reduce sticking and protect the decorations. Avoid pressing down on the cookies when closing the container.
Refrigerating the Cookies
Refrigeration is an option if your kitchen is particularly warm and the chocolate decorations are softening. Place the cookies in an airtight container and refrigerate them for up to one week for best quality.
Keep in mind that refrigeration can make the cookie centers and chocolate firmer. Let the cookies sit at room temperature briefly before serving so the peanut butter flavor and texture are more enjoyable.
Freezing Peanut Butter Spider Cookies
The decorated cookies can be frozen, although the candy eyes and chocolate legs may become less attractive if handled roughly.
Arrange the completely cooled cookies in a single layer in a freezer-safe container until firm. Separate additional layers with parchment paper, then seal the container well. For the best quality, use within about 2 months.
Thaw the cookies in their container in the refrigerator or at room temperature, depending on your kitchen conditions. Keeping them covered during thawing helps limit condensation directly on the chocolate decorations.
Making the Cookies Ahead
You can prepare the cookie dough ahead of time and refrigerate it in a covered container. Allow the dough to soften enough to portion and roll in sugar before baking. The baking sheet, peanut butter cups, chocolate chips, neutral oil, and candy eyes should also be ready before you start.
For the neatest presentation, decorate the cookies on the day you plan to serve them. This gives the chocolate legs and candy eyes a chance to set while helping the finished spiders look fresh.
Estimated Nutrition
The nutritional values for Peanut Butter Spider Cookies depend on the size of each cookie, the amount of sugar used for rolling, the size of the mini peanut butter cups, and how much melted chocolate is used for decorating.
For planning purposes, approximately 200–250 calories per cookie is a reasonable preliminary estimate for a batch yielding around 18–24 cookies. This is not a verified nutritional calculation, and the actual value may differ depending on the finished yield and the amount of decoration on each cookie.
The cookies contain peanut butter, butter, flour, sugar, and chocolate, making them a rich dessert rather than a low-calorie snack. For a more accurate estimate, calculate the nutrition using the actual ingredient labels and the final number of cookies produced.
Frequently Asked Questions
Can I Make Peanut Butter Spider Cookies Without Candy Eyes?
Yes. If you cannot find candy eyeballs, you can use small dots of white icing with tiny dots of melted chocolate to create eyes. Add them carefully and allow the decorations to set before serving. The candy eyes are part of the supplied recipe, but this is a practical decorating alternative.
Why Are My Peanut Butter Spider Cookies Crumbly?
Cookies may become crumbly if too much flour is added, the dough is overmixed, or the cookies are baked for too long. Measure the flour accurately, mix only until the dough comes together, and remove the cookies when their edges are set and their centers still look slightly soft.
When Should I Add the Mini Peanut Butter Cups?
Add the mini Reese’s Peanut Butter Cups after the cookies finish baking, while they are still warm enough to help the candies adhere. Press gently so the cups settle into the tops without breaking the cookies.
How Do I Keep the Chocolate Spider Legs Neat?
Allow the peanut butter cups to settle before piping the legs. Use melted chocolate that flows smoothly but is not excessively hot, and cut only a tiny opening in your piping bag. Practice a few lines on parchment paper first if you want more control over the thickness.
Can I Make These Cookies Ahead for a Halloween Party?
Yes. You can prepare the dough ahead and bake and decorate the cookies closer to the event. Once the chocolate has set, store them in an airtight container in a cool place. For the best presentation, avoid stacking them until the decorations are firm.
Are Peanut Butter Spider Cookies Suitable for People With Nut Allergies?
No. The recipe contains peanut butter and peanut butter cups, so it is not suitable for people who need to avoid peanuts. Because these are common allergens, clearly identify the cookies when serving them at parties or school events.
A Fun Halloween Treat to Share
Peanut Butter Spider Cookies turn a familiar peanut butter cookie into a festive Halloween dessert with just a few playful decorations. The combination of soft cookies, peanut butter cups, semi-sweet chocolate legs, and candy eyes creates a treat that looks charming on a party platter and tastes just as inviting.
Prepare the ingredients ahead, take your time with the chocolate decorations, and let the finished cookies set before serving. These little spiders are a cheerful addition to Halloween celebrations and a fun baking project to enjoy with family and friends.
Print
Peanut Butter Spider Cookies
- Total Time: 45 minutes
- Diet: Vegetarian
Description
Peanut Butter Spider Cookies are soft, chewy peanut butter cookies topped with mini Reese’s Peanut Butter Cups, melted chocolate spider legs, and candy eyeballs. These fun Halloween cookies combine rich peanut butter flavor with sweet chocolate decorations for a festive treat to share at parties and seasonal gatherings.
Ingredients
- ½ cup (113g) unsalted butter (1 stick, room temperature)
- ½ cup (107g) brown sugar
- ⅓ cup (66g) granulated sugar
- ¾ cup (201g) creamy peanut butter (not natural)
- 1 large egg
- 1 tsp vanilla extract
- 1 ½ cups (180g) all-purpose flour
- 1 tsp baking soda
- ½ tsp baking powder
- ½ tsp salt
- Granulated sugar (for rolling the cookies)
- Mini Reese’s Peanut Butter Cups
- ½ cup (85g) semi-sweet chocolate chips (for melting)
- ½ tsp neutral oil (for melting)
- Candy eyeballs
Instructions
- In a large mixing bowl, cream the room-temperature butter with the brown sugar and granulated sugar until the mixture is smooth and fluffy.
- Add the creamy peanut butter and mix until evenly combined.
- Mix in the egg and vanilla extract until incorporated, scraping down the sides of the bowl as needed.
- In a separate bowl, combine the all-purpose flour, baking soda, baking powder, and salt.
- Add the dry ingredients to the wet mixture and mix just until a cohesive cookie dough forms.
- Shape the dough into evenly sized portions and roll each portion in additional granulated sugar.
- Arrange the dough portions on a prepared baking sheet, leaving space between them. Bake according to the original recipe’s specified temperature and time; these details were not included in the supplied recipe information.
- While the cookies are still warm, gently press one mini Reese’s Peanut Butter Cup onto the top of each cookie.
- Allow the cookies to cool enough for the peanut butter cups to hold their shape.
- Place the semi-sweet chocolate chips and neutral oil in a microwave-safe bowl. Heat in short intervals, stirring between each, until the chocolate is smooth.
- Transfer the melted chocolate to a piping bag or a zip-top bag with a very small corner snipped off.
- Pipe thin chocolate lines extending from the sides of each peanut butter cup to create spider legs.
- Add candy eyeballs to the front of each peanut butter cup, using a little melted chocolate to help them adhere if needed.
- Let the chocolate decorations set completely before serving or storing the cookies.
Notes
- Use conventional creamy peanut butter rather than natural peanut butter for a more consistent dough texture.
- Add the peanut butter cups while the cookies are warm, but allow the cookies to cool enough before decorating so the candies do not melt excessively.
- Use a small piping opening to create thin spider legs, and let the decorations set before stacking the cookies.
- Prep Time: 20 minutes (estimated)
- Cook Time: 10–12 minutes
- Category: Recipes
- Method: Baked
- Cuisine: American
Nutrition
- Serving Size: 1 cookie
- Calories: 225 kcal
- Sugar: 16 g
- Sodium: 160 mg
- Fat: 13 g
- Saturated Fat: 5 g
- Unsaturated Fat: 7 g
- Trans Fat: 0 g
- Carbohydrates: 25 g
- Fiber: 1 g
- Protein: 5 g
- Cholesterol: 20 mg
Keywords: Peanut Butter Spider Cookies, Halloween peanut butter cookies, Halloween spider cookies, Reese’s spider cookies, Halloween desserts
Leave a Comment