
Red velvet cupcakes are known for their beautiful red color, soft texture, and delicate cocoa flavor. These classic cupcakes have a subtle chocolate taste that sets them apart from traditional vanilla and chocolate cupcakes. Buttermilk adds a gentle tang, while vinegar helps create the characteristic texture associated with red velvet baking. The result is a batch of eye-catching cupcakes that feels special enough for celebrations but simple enough to prepare at home.
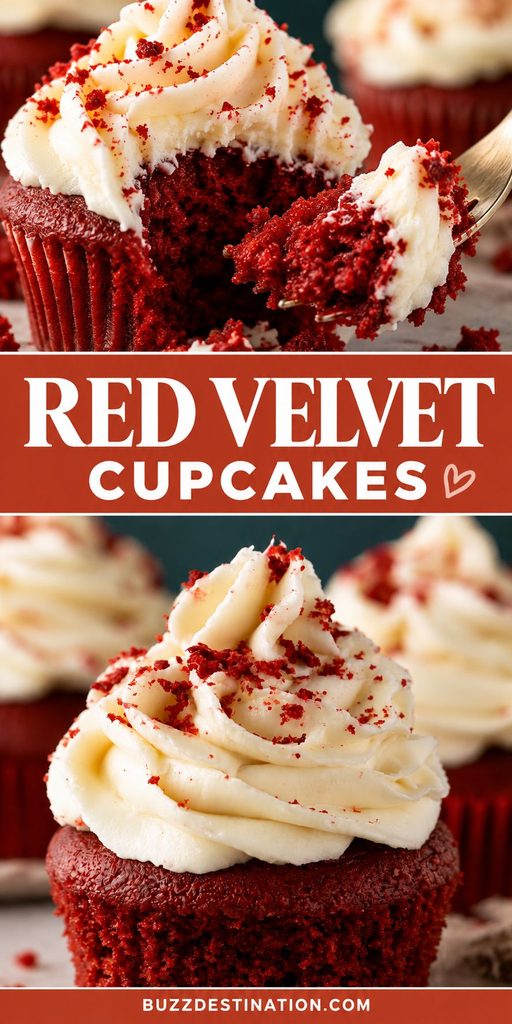
This recipe combines butter, sugar, eggs, cocoa, and vanilla with a traditional buttermilk mixture to create a balanced red velvet flavor. Red food coloring gives the cupcakes their signature appearance, making them a lovely choice for birthdays, Valentine’s Day, holiday gatherings, or an afternoon baking project. Serve them on their own or add your favorite frosting when you’re ready to decorate.
Why You’ll Love This Recipe
- Classic red velvet flavor: A little cocoa provides a mild chocolate note without overpowering the other ingredients.
- Beautiful color: Red food coloring creates the familiar red velvet appearance that makes these cupcakes stand out on a dessert table.
- A soft, tender crumb: Buttermilk contributes moisture and a subtle tang that complements the sweetness of the batter.
- Simple baking ingredients: Butter, sugar, eggs, flour, cocoa, and a few pantry staples form the foundation of this recipe.
- Perfect for special occasions: These cupcakes work well for birthdays, Valentine’s Day, Christmas parties, and other celebrations.
- Easy to personalize: Once baked and cooled, the cupcakes can be decorated with your preferred frosting, sprinkles, or other toppings.
Preparation and Tools
Before starting, gather your ingredients and prepare your cupcake pan. Having everything measured and ready makes the mixing process easier, especially when working with red food coloring.
You’ll need a standard cupcake or muffin pan, paper cupcake liners, mixing bowls, measuring cups and spoons, a hand mixer or stand mixer, a whisk, and a rubber spatula. A spoon or cookie scoop can also help distribute the batter evenly between the cupcake wells.
Line the cupcake pan before mixing the batter so you can fill the liners as soon as the mixture is ready. Measure the flour carefully, and allow the butter and eggs to come closer to room temperature if possible. This helps the ingredients combine more evenly.
Because red food coloring can stain countertops, clothing, and utensils, handle it carefully and wipe up spills promptly.
Preparation Tips for Red Velvet Cupcakes
Measure the flour carefully
Flour provides the structure for the cupcakes, but too much can make them dense or dry. If measuring with cups, fluff the flour first, spoon it into the measuring cup, and level the top without packing it down. For the most consistent results, use a kitchen scale if you have one and a reliable weight conversion for your flour.
Use softened butter
The butter should be soft enough to press gently with a finger but not melted or greasy. Softened butter can incorporate air when beaten with sugar, helping create a lighter texture. If the butter is too cold, it may not mix smoothly; if it is melted, the batter can behave differently.
Pay attention to the buttermilk
Buttermilk adds both moisture and acidity to this recipe. Measure the full cup accurately and have it ready before mixing. If it has been refrigerated, letting it lose some of its chill can help it combine more smoothly with the other ingredients.
Handle the red food coloring carefully
The recipe calls for 2 ounces of red food coloring. Measure that amount as written, checking the label on your coloring to confirm the quantity. Different products vary in concentration, so the final shade may depend on the type you use. Gel and liquid food colorings are not always interchangeable in equal amounts.
Keep the cocoa flavor balanced
The two tablespoons of cocoa give these cupcakes their characteristic light chocolate flavor. Measure the cocoa rather than adding extra by eye. Increasing it can change both the flavor and the appearance of the finished cupcakes.
Prepare the vinegar and baking soda
The recipe includes both vinegar and baking soda. These ingredients are important to the batter’s chemical leavening, so measure them accurately and avoid leaving either out. Have them ready before you begin mixing to keep the preparation organized.
Ingredients for Red Velvet Cupcakes
Each ingredient contributes something important to the cupcakes’ flavor, color, or structure.
- Butter: Half a cup provides richness and helps create the base for the cupcake batter.
- Sugar: One and a half cups sweetens the cupcakes and is beaten with the butter during preparation.
- Eggs: Two eggs help bind the ingredients and contribute structure and richness.
- Red food coloring: Two ounces provide the signature red appearance. The intensity will depend on the coloring product.
- Flour: Two and a quarter cups give the cupcakes their structure.
- Baking soda: One and a half teaspoons provide leavening and work alongside the acidic ingredients in the recipe.
- Salt: Half a teaspoon balances the sweetness and rounds out the flavor.
- Cocoa: Two tablespoons add the subtle chocolate note that distinguishes red velvet from a plain vanilla cupcake.
- Buttermilk: One cup contributes moisture and a mild tang.
- Vinegar: One tablespoon adds acidity to the batter and works with the baking soda.
- Vanilla extract: One teaspoon brings warmth and complements the cocoa and butter.
These quantities should remain unchanged for the supplied recipe. If you want to experiment with a different shade or flavor intensity in the future, adjust the recipe only after trying the original version.
How to Make Red Velvet Cupcakes
Step 1: Prepare the cupcake pan and ingredients
Begin by lining a standard cupcake pan with paper liners. Measure the butter, sugar, eggs, food coloring, flour, baking soda, salt, cocoa, buttermilk, vinegar, and vanilla extract.
Preheat the oven to the temperature specified by your chosen baking instructions. The supplied ingredient list does not include an oven temperature, so one should be confirmed before baking rather than guessed. Having the oven ready before the batter is mixed helps you move directly to baking.
Step 2: Cream the butter and sugar
Place the softened butter and sugar in a mixing bowl. Beat them together until the mixture looks lighter and creamy, scraping down the sides of the bowl as needed.
This step helps distribute the sugar throughout the butter and incorporates air into the mixture. Take time to combine them thoroughly, but avoid relying on color alone to judge when the mixture is ready.
Step 3: Add the eggs and red food coloring
Add the two eggs and mix until incorporated. Scrape the bowl to ensure there are no large pockets of unmixed butter or sugar along the sides.
Next, add the red food coloring and mix until the color is distributed evenly. The batter may look intensely red at this stage, which is expected. Avoid adding extra coloring beyond the amount specified in the recipe.
Step 4: Combine the dry ingredients
In a separate bowl, whisk together the flour, baking soda, salt, and cocoa powder. Whisking helps distribute the cocoa and leavening throughout the flour, reducing the chance of concentrated pockets in the finished cupcakes.
Make sure the cocoa is broken up and the mixture looks uniform before adding it to the wet ingredients.
Step 5: Incorporate the dry ingredients and buttermilk
Add the dry mixture to the butter mixture in portions, alternating with the buttermilk. Mix gently between additions until the ingredients are incorporated. Scrape the bowl when needed to catch any flour or batter clinging to the sides.
Avoid beating the batter longer than necessary once the flour has been added. Excessive mixing can develop the flour’s gluten and produce cupcakes with a firmer texture than intended.
Step 6: Add the vinegar and vanilla
Add the vinegar and vanilla extract, then mix just until they are evenly distributed throughout the batter.
The vinegar contributes acidity, while vanilla complements the cocoa and butter. Once everything is combined, check the bottom of the bowl for unmixed ingredients. The finished batter should have a consistent red color without visible streaks of flour.
Step 7: Fill the cupcake liners
Divide the batter evenly among the prepared cupcake liners, leaving room at the top for the cupcakes to rise. Try to keep the portions similar in size so the cupcakes bake at approximately the same rate.
A spoon or cookie scoop makes this easier and helps keep the pan tidy. If a little batter lands on the top of the pan, wipe it away before placing the pan in the oven.
Step 8: Bake until set
Bake the cupcakes in the preheated oven using a verified baking temperature and timing for this recipe. Since neither the oven temperature nor the baking time was included in the supplied ingredients, confirm those details before proceeding.
Look for cupcakes that have risen and appear set in the center. A toothpick inserted into the middle of a cupcake should come out clean or with a few moist crumbs rather than wet batter. Avoid opening the oven repeatedly, as this can interfere with even baking.
Step 9: Cool before decorating
Remove the pan from the oven once the cupcakes are baked through. Let them cool briefly in the pan, then transfer them to a wire rack to finish cooling.
Allow the cupcakes to cool completely before adding frosting. Decorating while they are still warm can cause frosting to soften or slide off. Once cool, the cupcakes are ready to serve plain or finish with your preferred topping.
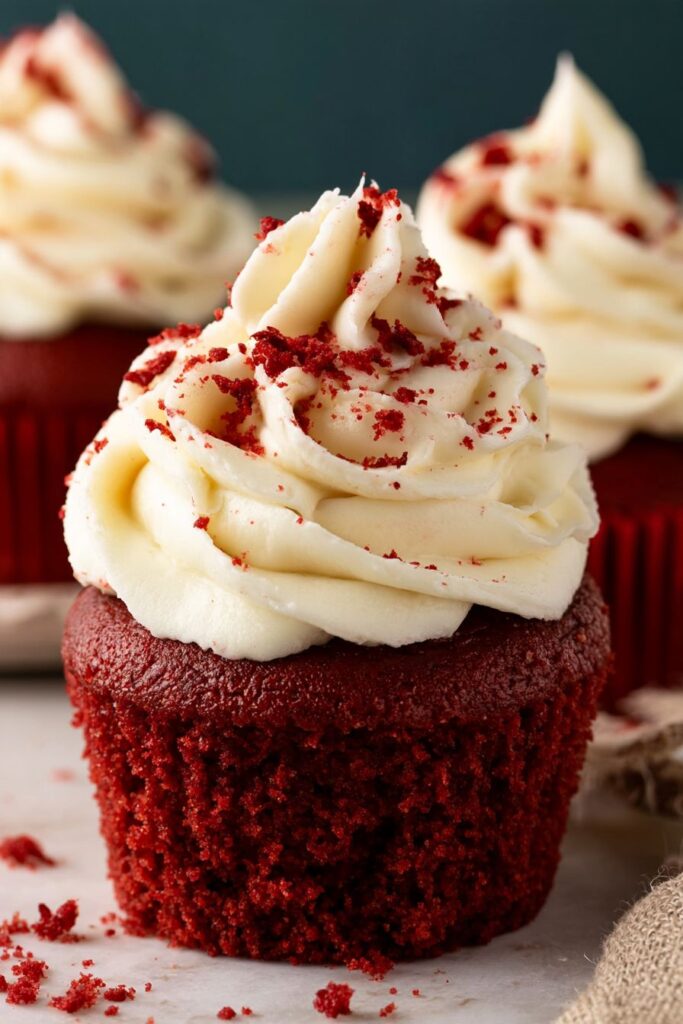
What to Serve With Red Velvet Cupcakes
Red velvet cupcakes have a sweet, buttery flavor with a subtle cocoa finish, so they pair well with creamy toppings and simple drinks. Choose accompaniments that complement their flavor without overwhelming the cupcakes.
- Cream cheese frosting: Its slight tang balances the sweetness of the cupcakes and is a classic choice for red velvet desserts.
- Vanilla buttercream: Smooth, sweet buttercream creates a traditional cupcake finish and works well for birthday parties and celebrations.
- White chocolate frosting: The creamy sweetness of white chocolate complements the mild cocoa flavor and creates an attractive contrast with the red cupcakes.
- Fresh berries: Strawberries or raspberries add a fresh, fruity element when serving cupcakes on a dessert platter.
- Coffee or espresso: The roasted flavor of coffee pairs naturally with cocoa and provides a pleasant contrast to the sweetness.
- A glass of cold milk: Milk is a simple accompaniment that works especially well for children’s parties and casual afternoon treats.
For a celebration, arrange the cupcakes on a serving stand and decorate them with your chosen frosting. A simple swirl of white or cream-colored frosting makes the red color stand out without requiring complicated decorations.
Storage Instructions
How to Store Red Velvet Cupcakes at Room Temperature
If the cupcakes are unfrosted, allow them to cool completely before storing them. Place them in an airtight container to help prevent the edges from drying out.
For the best texture, enjoy them within 1–2 days when kept in a cool room away from direct sunlight and heat. If your kitchen is particularly warm, refrigeration may be a better option.
Once frosted, storage depends on the type of frosting. Cupcakes topped with cream cheese frosting should be refrigerated because of the perishable ingredients. Follow appropriate food-safety guidance for any other frosting containing dairy or eggs.
How to Refrigerate Red Velvet Cupcakes
Place cooled cupcakes in an airtight container and refrigerate them if the frosting requires it or if the room is too warm for safe storage. Properly stored cupcakes are generally best enjoyed within 3–4 days, although the exact quality will depend on the frosting and storage conditions.
Refrigeration can make the cake feel firmer than it does at room temperature. If the frosting and food-safety requirements allow, let a cupcake sit at room temperature briefly before serving so its texture becomes softer.
Keep the cupcakes covered during storage to prevent them from absorbing odors from other foods in the refrigerator.
Can You Freeze Red Velvet Cupcakes?
Yes, unfrosted red velvet cupcakes can be frozen for convenient future desserts.
- Allow the cupcakes to cool completely.
- Arrange them in a single layer and freeze until firm.
- Wrap each cupcake securely or place them in a freezer-safe airtight container.
- Label the container with the date and store it in the freezer.
For the best quality, use frozen cupcakes within about 2–3 months. Thaw them in the refrigerator or at room temperature while protected from condensation, then decorate once completely thawed.
Frosted cupcakes can also sometimes be frozen, but the result depends on the frosting. Cream cheese frosting may change texture after freezing, so freezing the cupcakes separately and decorating them after thawing is often the simpler approach.
Can You Make Red Velvet Cupcakes Ahead of Time?
Yes. Bake the cupcakes a day ahead, allow them to cool completely, and store them in an airtight container. Prepare the frosting separately if desired, then decorate the cupcakes closer to serving time.
For a party, you can also bake the cupcakes in advance and freeze them unfrosted. This allows you to spread out the preparation and finish the desserts when you need them.
Estimated Nutrition
The following values are rough estimates based on the supplied ingredients and an assumed yield of 12 standard cupcakes. The actual nutrition per cupcake will depend on the final yield, ingredient brands, and portion sizes. Frosting is not included because it was not specified in the recipe.
| Nutrient | Amount per cupcake |
|---|---|
| Calories | 250 kcal |
| Protein | 4 g |
| Carbohydrates | 40 g |
| Fat | 9 g |
| Saturated Fat | 5 g |
| Cholesterol | 50 mg |
| Fiber | 1 g |
| Sugar | 23 g |
| Sodium | 300 mg |
| Potassium | 65 mg |
| Vitamin A | 260 IU |
| Vitamin C | 0 mg |
| Calcium | 40 mg |
| Iron | 1.5 mg |
Nutrition is estimated per cupcake, assuming the recipe makes 12 cupcakes. These figures are approximate and have not been laboratory verified.
Frequently Asked Questions
What makes red velvet cupcakes different from chocolate cupcakes?
Red velvet cupcakes have a milder cocoa flavor than most traditional chocolate cupcakes. Their characteristic combination of cocoa, buttermilk, vinegar, and red food coloring creates a distinct flavor profile and appearance. Chocolate cupcakes generally emphasize a stronger chocolate taste.
Can I use a different type of red food coloring?
The recipe specifies 2 ounces of red food coloring. Different products have different concentrations, so the shade may vary. If you use a gel coloring or another concentrated product, check its instructions before substituting because equal amounts may not produce the same result.
For the closest match to the supplied recipe, use the specified quantity of a suitable liquid food coloring.
Why do red velvet cupcakes contain vinegar?
Vinegar provides acidity and works with the baking soda as part of the recipe’s leavening system. It also contributes to the characteristic balance of flavors in red velvet baking. The amount should be measured accurately rather than omitted or replaced casually.
Can I make these cupcakes without frosting?
Absolutely. The cupcakes can be served plain once they have cooled completely. Their red color and mild cocoa flavor make them attractive on their own, especially when served alongside coffee, tea, or milk.
If you want a more traditional red velvet presentation, add cream cheese frosting or vanilla buttercream before serving.
How do I know when the cupcakes are fully baked?
The tops should look set, and a toothpick inserted into the center should come out clean or with a few moist crumbs. Wet batter on the toothpick means the cupcakes need more baking time.
Check the center of a cupcake rather than judging only by the color of the surface. Red food coloring makes visual browning less useful as a doneness indicator.
Why did my cupcakes turn out dense?
Dense cupcakes can result from measuring too much flour, using butter that is too cold or melted, or overmixing after adding the flour. Make sure the flour is measured carefully, cream the butter and sugar properly, and mix the finished batter only until the ingredients are combined.
Also check that your baking soda is fresh and that your oven is at the correct temperature before baking.
A Sweet Red Velvet Treat for Any Occasion
These red velvet cupcakes bring together a delicate cocoa flavor, a hint of tang from buttermilk, and their unmistakable red color. Serve them plain for a simple homemade dessert or add cream cheese frosting for a more traditional presentation. With careful measuring, gentle mixing, and proper cooling, you can prepare a batch that looks lovely on a celebration table or alongside an everyday cup of coffee.
Print
Red Velvet Cupcakes
- Total Time: 40 minutes
- Yield: 12 cupcakes 1x
Description
These Red Velvet Cupcakes feature a beautiful red color, a delicate cocoa flavor, and a tender texture made with butter, buttermilk, and vanilla. They are a lovely homemade dessert for birthdays, Valentine’s Day, holiday gatherings, and everyday treats.
Ingredients
- ½ cup butter
- 1½ cups sugar
- 2 eggs
- 2 ounce red food coloring
- 2¼ cups flour
- 1½ teaspoon baking soda
- ½ teaspoon salt
- 2 tablespoon cocoa
- 1 cup buttermilk
- 1 tablespoon vinegar
- 1 teaspoon vanilla extract
Instructions
- Prepare a standard cupcake pan with paper liners. Preheat the oven to the temperature specified by your verified baking instructions.
- Beat the butter and sugar together until creamy and lighter in texture.
- Add the eggs and mix until incorporated. Add the red food coloring and mix until the color is evenly distributed.
- In a separate bowl, whisk together the flour, baking soda, salt, and cocoa powder.
- Gradually add the dry ingredients to the butter mixture, alternating with the buttermilk. Mix gently until incorporated.
- Add the vinegar and vanilla extract. Mix just until evenly combined, scraping down the sides of the bowl as needed.
- Divide the batter evenly among the prepared cupcake liners, leaving room for the cupcakes to rise.
- Bake at the verified oven temperature until the cupcakes are set and a toothpick inserted into the center comes out clean or with a few moist crumbs. The original recipe does not specify a baking temperature or time, so confirm these before baking.
- Allow the cupcakes to cool briefly in the pan, then transfer them to a wire rack to cool completely before serving or decorating.
Notes
- Measure the flour carefully to help prevent dense cupcakes.
- Allow the cupcakes to cool completely before adding frosting.
- Store unfrosted cupcakes in an airtight container. Refrigerate cupcakes topped with cream cheese frosting.
- Prep Time: 20 minutes
- Cook Time: 20 minutes
- Category: Recipes
- Method: Baking
- Cuisine: American
Nutrition
- Serving Size: 12 cupcakes
- Calories: 250 kcal
Keywords: red velvet cupcakes, homemade red velvet cupcakes, easy red velvet cupcakes, red velvet cupcake recipe, classic red velvet dessert
Leave a Comment